How to Compress a PDF on Mac Without Wrecking the Quality
To reduce PDF size on Mac, run it through a free online compressor set to a moderate level, or use Preview's File > Export > Reduce File Size option — the online route generally gives you more control over the size-versus-clarity tradeoff.
To reduce PDF size on Mac, run it through a free online compressor set to a moderate compression level, or use Preview's built-in File > Export > Reduce File Size option. For more control over the size-versus-clarity tradeoff, an online compressor with adjustable levels usually beats Preview's one-size-fits-all filter. Neither route is lossless — both work by re-encoding the images inside the PDF — so the goal is choosing a level whose losses you cannot see.
PDFs balloon in size for a few predictable reasons: embedded photos or design assets saved at print resolution, scanned pages stored as full-resolution images instead of searchable text, duplicated font data, and metadata left behind from every previous edit and re-save. A five-page report can hit 20MB because a screenshot or a scanned signature page was never optimized before it got dropped in — why your PDF is so large in the first place is worth understanding on its own before you try to fix it. In practice, the problem usually isn't obvious until you hit an email attachment cap, a job portal's upload limit, or a client system that silently rejects anything over a certain size — at which point the fix matters a lot more than the explanation.
The "without losing quality" part matters because most people searching for how to compress a PDF on Mac have already been burned once — either by a filter that turns crisp text into a blurry mess, or by a tool that barely shrinks the file at all. This guide covers two real methods you can use today: a free online compressor that works in any browser, and Preview, which is already installed on your Mac.
Method 1 — Compress a PDF Online (Fastest, No Software Needed)
An online compressor is the quickest PDF size reducer for Mac because there's nothing to install and no export menu to hunt through. It also means the same process works on a work laptop that doesn't allow new software installs, or on any machine with a browser — Windows or Mac — since none of it depends on macOS specifically. Here's the process using our free PDF compressor:
- Open the compressor at utilitly.com/compress-pdf in Safari, Chrome, or any browser. Nothing to install, though you will need to be signed in to a free account — compression runs on a hosted engine rather than on your Mac.
- Drop in your PDF. Files up to 100 MB are accepted. Your file is then sent over an encrypted connection to the compression engine and the result comes back to your browser.
- Pick a compression level. Choose Recommended for a moderate, general-purpose pass, or Extreme for the smallest file — which downsamples images to 72 DPI and strips non-essential metadata.
- Compress and download. The tool shows your original and new file size side by side so you can see exactly how much you saved before you download.
Which compression level should I choose?
Recommended is the safer default: it applies moderate compression to the images inside your PDF, which on an everyday document is usually indistinguishable from the original at normal viewing size. Extreme pushes much harder — it downsamples embedded images to 72 DPI, screen resolution, and strips non-essential metadata. Both levels re-encode image data, so both are lossy; the difference is how much detail you give up. Real text and vector graphics are untouched by either level and stay sharp, which is why a text document survives compression far better than a scan does. If you're not sure which to pick, start with Recommended and look at the result — and note that running the output through a second time rarely helps, for the reasons covered further down.
Method 2 — Use Preview (Built-In, No Download)
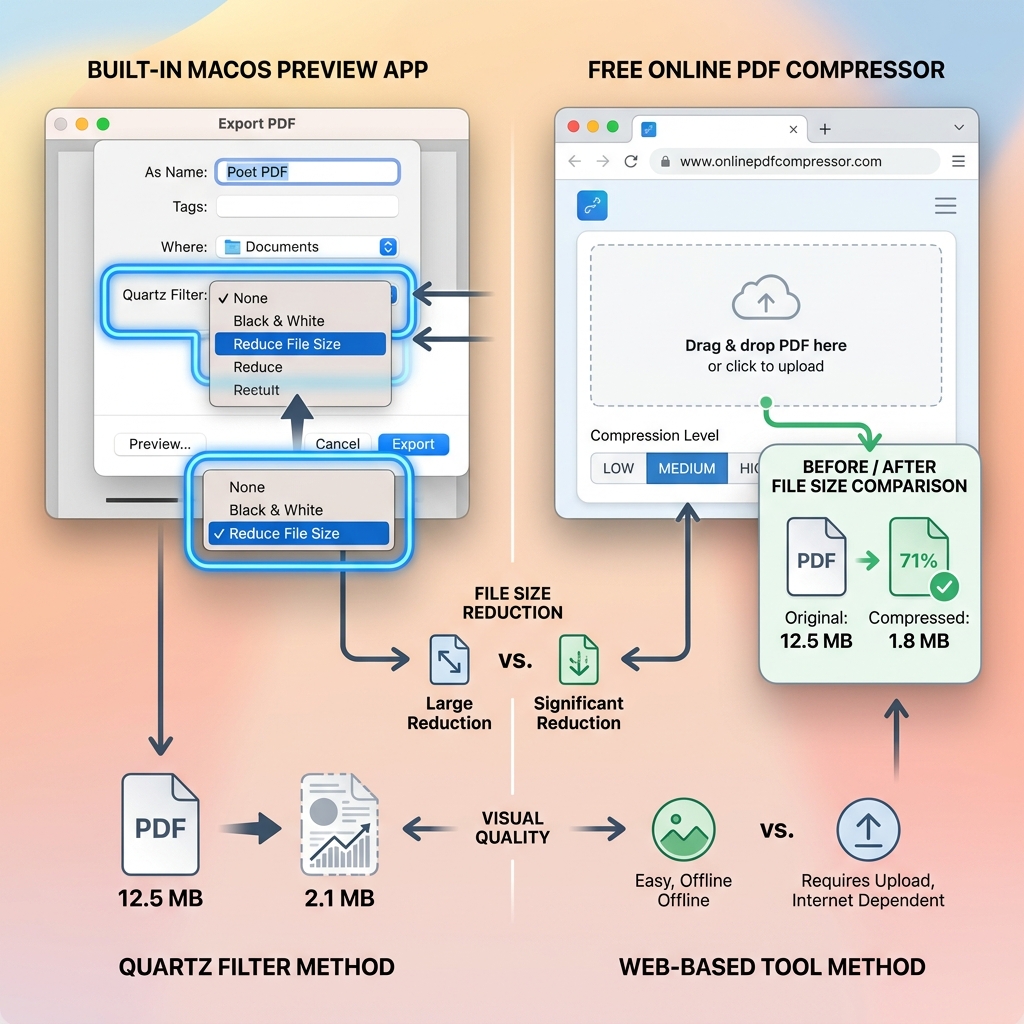
If you'd rather not leave your desktop, Preview — the app that opens PDFs by default on macOS — has a built-in size-reduction filter. Apple documents the steps directly in its Preview User Guide:
- Open the PDF in Preview.
- Go to File > Export (not "Export As" — that keeps the original format without offering the filter option).
- In the export dialog, set the Quartz Filter dropdown to Reduce File Size.
- Click Save.
Tip: Save As a copy first, or change the filename in the export dialog, so you don't overwrite your original if the result doesn't look right.
The honest caveat here, which Apple's own documentation acknowledges: the Reduce File Size filter is a single, fixed compression profile. On some files it over-compresses embedded photos into visibly soft, blocky images. On others — particularly text-only PDFs with little image content — it barely reduces the file size at all, because there's nothing left in it that the filter knows how to shrink. Quartz filters live under the hood in ColorSync Utility, where you can inspect or even build a custom filter if the default one doesn't suit a file type you compress often.
For a single PDF you only need to shrink once, Preview is often enough — you don't need to leave the app you already have open to view the file. It becomes limiting once you're compressing the same type of document repeatedly and want predictable, adjustable results instead of one fixed filter applied the same way every time.
How to Avoid Losing Quality When Compressing a PDF
Three rules cover almost every quality complaint we hear about compressing a PDF without losing quality:
- Match the compression level to the end use. A PDF headed to a client's inbox or a web upload can tolerate more compression than one going to a commercial printer, where every pixel of an embedded photo matters.
- Never re-compress an already-compressed file. Running a PDF through a second compression pass rarely shrinks it further and can compound quality loss if either tool touches image data. Always compress from the original.
- Verify the output before deleting the original. Open the compressed file, zoom into any photos or scanned pages, and check that text is still sharp. Keep the source file until you've confirmed the result is usable.
- Treat scanned pages differently from photographs. A scanned document is really one large image per page, not text with a photo next to it — a compression setting that looks fine on a portfolio photo can make small printed text on a scanned page noticeably harder to read.
None of these rules are complicated on their own, but skipping any one of them is usually how a "compressed" PDF ends up looking worse than the space it saved was worth.
For the deeper mechanical explanation, our companion piece on whether compressing a PDF reduces quality covers that separately. For this guide, the more useful thing is showing what actually happens to a real file, so we ran one through both methods above and measured it.
| Test file | Original | Utilitly — Recommended | Utilitly — Extreme | Preview — Reduce File Size |
|---|---|---|---|---|
| Image-heavy PDF (6-page design deck, 300 DPI JPEGs) | 5.47 MB | 5.47 MB (0%) | 5.47 MB (0%) | Not independently tested |
| Text-heavy PDF (40-page unoptimized report export) | 85.6 KB | 46.5 KB (46%) | 46.2 KB (46%) | Not independently tested |
The 0% result on the image-heavy file isn't a bug, and it isn't a failed download either. That deck's JPEGs were already compressed close to their practical limit, so the compression engine couldn't produce anything smaller — and the tool will never hand you back a file larger than the one you gave it, so it returned your original unchanged. A 0% row means "there was nothing left to take," not "quality was preserved by magic." The 46% result on the text-heavy file shows the other end of the range: a 40-page report exported without optimization had plenty of slack to give up.
Working Toward a Specific File Size
Sometimes "smaller" isn't good enough — a job portal caps uploads at 2MB, or an email gateway rejects anything over 5MB, and you need to land under a specific number. There's no field to type a target size into, here or in Preview: you pick a compression level, look at the resulting size, and adjust. Start with Recommended, and if you're still over the limit, try Extreme. Our guide to compressing a PDF toward 100 KB walks through that loop for the tightest common limits, including government forms and application portals.
Common Mistakes to Avoid
- Re-compressing an already-compressed PDF. A second pass rarely helps and risks compounding quality loss.
- Expecting a scanned or image-only PDF to compress like a text document. If every "page" is actually a photo of a page, structural compression has very little to work with — you're compressing an image wrapped in a PDF, not text.
- Confusing file-size reduction with security settings. Compressing a PDF doesn't add a password or restrict printing and copying — that's a separate step entirely.
- Not checking the output before deleting the original. Always confirm the compressed file opens correctly and looks right before you get rid of the source.
- Over-compressing a document headed for print. Save the aggressive settings for files that will only ever be viewed on a screen.
Ready to see it on your own file? Drop a PDF into our free PDF compressor and watch the before-and-after size appear — nothing to install, and if compression can't shrink the file you get your original back untouched.
Frequently Asked Questions
Does compressing a PDF on Mac reduce its quality?
Image quality, yes — both Preview's filter and Utilitly's two levels work by re-encoding the images inside the PDF, and that is lossy. Real text and vector graphics are not re-rendered, so they stay sharp. The practical question isn't whether anything is lost but whether you can see what was lost: on an everyday document, Utilitly's Recommended level usually looks the same as the original at normal viewing size.
What's the difference between Preview's Reduce File Size and an online compressor?
Preview applies one fixed Quartz filter to every file, with no adjustable levels. A dedicated online compressor typically gives you multiple compression levels to choose from, so you can match the tradeoff to how the PDF will be used.
Can I compress a scanned PDF on Mac?
Yes, but expect smaller gains than with a text-based document. A scanned PDF is really a sequence of full-page images, so compression can only optimize those images — there's no separate text data to strip out.
Is it safe to compress a PDF online, or should I only use Preview?
It depends on the document. Utilitly's compressor sends your file over an encrypted connection to a hosted compression engine, so the PDF does leave your Mac. Preview does not — it runs entirely on your machine. If a document is sensitive enough that it must not leave your device, use Preview, or use one of Utilitly's browser-only tools for tasks like merging, splitting and watermarking, which do run locally.
How much smaller can I make a PDF before the quality drop shows?
It varies by document. In our own testing, a bloated text-heavy PDF shrank by 46% with no visible change, while an already-optimized image-heavy PDF couldn't be shrunk at all and came back unchanged. The gain depends entirely on how much uncompressed image data is inside the file.